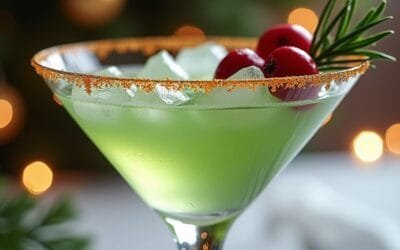
You'll love this elegant European-inspired liqueur that combines the cozy warmth of roasted chestnuts with smooth vodka, fragrant vanilla, and aromatic cinnamon. After a two-week infusion period, the amber-colored spirit gets dressed up with a show-stopping caramel rim that'll make your guests' eyes light up! Simply score and roast fresh chestnuts, steep them in vodka with spices, strain the mixture, and get creative with that golden caramel rim. It's like capturing the essence of a snowy winter evening spent by a crackling fireplace, all in one sophisticated glass. There's so much more to discover about this fascinating winter warmer.
History

The tradition of roasted chestnut liqueur dates back to medieval Europe, where monasteries first developed methods of infusing spirits with local ingredients.
You'll find chestnut origins stretching from ancient Rome to Constantinople, where these nuts were prized for their sweet, earthy flavor and nutritional value.
Monks, those clever pioneers of liqueur traditions, discovered that steeping chestnuts in alcohol created a warming drink perfect for cold winter nights.
You've probably seen street vendors selling hot roasted chestnuts, a tradition that's directly connected to this luxurious libation.
In the 1700s, European nobility fell head over heels for chestnut-infused spirits, and soon every fashionable household had their own secret recipe.
They'd gather chestnuts from towering trees that dotted the countryside, carefully roasting them before creating their prized concoctions.
The addition of a caramel rim? That's a more recent twist, first appearing in upscale Parisian bars during the 1920s.
It's amazing to think that what started as a humble monastic experiment has evolved into today's sophisticated cocktail, proving that sometimes the best traditions are the ones that keep evolving!
Recipe

Roasted Chestnut Liqueur is a sophisticated homemade spirit that captures the essence of winter in a glass. This luxurious drink combines the natural sweetness of roasted chestnuts with smooth vodka, enhanced by warm notes of vanilla and cinnamon.
The process of creating this liqueur requires patience, as the ingredients need time to steep and develop their complex flavors. While the preparation is straightforward, attention to detail during the steeping process and caramel rim creation guarantees a professional-quality result that rivals commercial varieties.
- 2 cups roasted chestnuts, peeled
- 2 cups premium vodka
- 1/2 cup brown sugar
- 1 vanilla bean
- 1 cinnamon stick
- 1/2 cup granulated sugar (for rim)
- 1/4 cup water (for rim)
- 2 tablespoons unsalted butter (for rim)
Place peeled roasted chestnuts in a large, clean glass jar with a tight-fitting lid. Add vodka, brown sugar, split vanilla bean, and cinnamon stick. Seal the jar and store in a cool, dark place for 2 weeks, gently shaking every few days.
After steeping, strain the mixture through a fine-mesh strainer lined with cheesecloth into a clean bottle. For the caramel rim, combine granulated sugar and water in a small saucepan over medium heat, stirring until amber in color. Add butter, stir until smooth, and quickly dip the rims of chilled glasses before the caramel sets.
Temperature control is vital during the steeping process – keep the jar at a consistent room temperature, away from direct sunlight or heat sources. Check the jar periodically to verify the chestnuts remain fully submerged in the vodka, as any exposure to air can lead to spoilage or off-flavors.
The quality of ingredients greatly impacts the final product. Use premium vodka for a smoother finish, and confirm chestnuts are fresh and properly roasted before steeping.
When making the caramel rim, work quickly as the mixture hardens rapidly once removed from heat. If needed, prepare the caramel rim just before serving to maintain its crisp texture.
Cooking Steps

You'll want to start this magnificent journey by roasting your chestnuts until they're perfectly tender and fragrant, just like the ones you'd find at a cozy winter market.
Next, you're ready to combine your roasted chestnuts with vodka, brown sugar, and spices in a large jar, letting nature work its magic for two full weeks.
Step 1. Roasting Fresh Chestnuts Thoroughly

Properly roasting fresh chestnuts requires careful attention to both preparation and timing. You'll want to start by selecting the best chestnut varieties – European or Chinese chestnuts work wonderfully for this liqueur, as they're naturally sweeter and meatier than their American cousins.
Before diving into roasting techniques, you'll need to score an "X" on the flat side of each chestnut – trust me, skip this step and you'll have mini chestnut explosions in your oven!
Spread them on a baking sheet, scored side up, like tiny soldiers ready for battle. Roast at 425°F for about 20-25 minutes, until those X's curl open like flower petals and the heavenly aroma fills your kitchen.
Here's the fun part: wrap your hot chestnuts in a kitchen towel and give them a gentle squeeze (like you're giving them a warm hug) to help loosen the shells.
Peel them while they're still warm – nobody likes wrestling with cold chestnuts! You'll know they're perfectly roasted when the inner skin comes away easily and the nuts are tender, not chewy or hard.
Step 2. Prepare Infusion Mixture

Once your roasted chestnuts have cooled completely, start the infusion process by combining them with the vodka in a large, clean mason jar or similar airtight container.
You'll want to make sure the chestnuts are fully submerged in the vodka – think of them as taking a lovely spirit bath!
Now, let's amp up those flavor profiles by adding the supporting cast: drop in your split vanilla bean (don't be shy, scrape those beautiful seeds right in), the cinnamon stick, and the brown sugar.
These infusion techniques might seem simple, but they're about to work some serious magic on your mixture. Give everything a gentle stir – you're fundamentally creating a winter wonderland in a jar!
Seal that container tight – we're talking twist-it-like-you-mean-it tight!
Place it in a cool, dark spot where it won't be disturbed, like that quiet corner of your pantry where you hide your secret chocolate stash.
Remember to give the jar a gentle shake every few days – think of it as tucking your chestnuts in and making sure they're playing nicely with their vodka friends!
Step 3. Strain and Filter Mixture

After two weeks of patient infusion, it's time to strain your chestnut-infused vodka mixture. Just like a skilled treasure hunter sifting for gold, you'll want to carefully separate those flavor-packed chestnuts from your precious liquid using a fine-mesh strainer lined with cheesecloth. Trust me, this step is essential for achieving that silky-smooth texture you're dreaming of!
Set up your straining station with a large bowl beneath your mesh strainer, and don't rush this process – among various infusion techniques, the double-strain method reigns supreme. First, pour the mixture through the cheesecloth-lined strainer, then, for extra clarity, strain it one more time without the cheesecloth. You'll be amazed at how crystal-clear your liqueur becomes!
For those interested in liqueur variations, you can experiment with different filtration materials like coffee filters or even activated charcoal, though our tried-and-true method works perfectly.
Once you've strained every last drop, transfer your liquid gold into a clean, sterilized bottle. Look at that gorgeous amber color – you've just created something magical that would make any European chestnut vendor proud!
Step 4. Create Caramel Syrup

The art of creating caramel syrup demands precision and careful attention to heat. You'll discover that mastering caramel techniques is like conducting a delicate dance between sugar and temperature – one wrong move, and you're left with a burnt, bitter mess!
Start by combining your granulated sugar and water in a spotlessly clean saucepan. As you explore different caramel variations, you'll notice how the color shifts from clear to golden, like a sunset in slow motion.
Keep the heat at medium and resist the urge to stir – seriously, put down that spoon! Just let the mixture bubble away until it reaches that gorgeous amber hue you're after.
Once you've achieved the perfect color (think honey-kissed copper), it's showtime! Add your butter and stir quickly, watching the mixture transform into liquid gold.
Don't dawdle here – caramel waits for no one, and it'll harden faster than your aunt's holiday fruitcake! You'll want to work swiftly when dipping your glass rims, creating that professional-looking finish that'll make your cocktail-loving friends gasp with admiration.
Step 5. Garnish Glasses With Caramel

Preparing your glasses for a caramel rim requires swift, precise movements and proper timing. Before you engage with the caramel techniques, make sure your cocktail glasses are squeaky clean and bone-dry – even a tiny drop of water will make your caramel throw a temper tantrum and refuse to stick!
Now, here's where the magic happens! Once your caramel reaches that gorgeous amber color (think honey-kissed sunset), you'll need to work faster than a caffeinated squirrel.
Hold each glass upside down at a 45-degree angle, and with a steady hand, dip the rim into the warm caramel. Give it a quick twist, like you're dancing the world's fastest waltz, then lift it straight up. Don't dawdle – that caramel's going to start hardening faster than your gym motivation in winter!
For perfect glass preparation, immediately turn each glass right-side-up and place it on a cooling rack. You'll see the caramel creating delicate, golden threads as it sets – it's like watching edible art come to life!
Let the rims harden completely before pouring in your luxurious chestnut liqueur.
Step 6. Bottle and Label Liqueur

Properly bottling your roasted chestnut liqueur marks an essential final step that'll guarantee its quality and shelf life.
You'll want to choose dark-colored glass bottles that protect your precious concoction from light damage, just like a superhero's shield guards against villains!
Before pouring in your liquid gold, sterilize those bottles like you mean it – a quick run through the dishwasher or a 10-minute hot water bath will do the trick.
Once they're squeaky clean and completely dry, carefully strain your liqueur one final time through a coffee filter to catch any remaining sediment.
Now's the fun part: get creative with your bottle design! Whether you're going for vintage-inspired apothecary bottles or sleek modern ones, make sure they've tight-fitting corks or screw caps.
For label ideas, let your imagination run wild! Design custom labels with the production date, ingredients, and maybe even a clever name like "Chestnuts Roasting in Vodka."
Don't forget to mention the alcohol content and storage instructions. Secure those labels with clear packing tape – nobody wants a soggy, illegible masterpiece falling off their bottle!
Wrapping Up

Through careful preparation and patience, you'll create a sophisticated roasted chestnut liqueur that's perfect for special winter gatherings.
The rich, amber-colored spirit, crowned with its glistening caramel rim, will absolutely dazzle your guests and elevate your cocktail presentation to new heights.
Remember, great things come to those who wait, and this liqueur is no exception! Your two-week infusion period has resulted in a beautifully complex spirit that captures the essence of roasted chestnuts in every sip.
When serving at festive gatherings, make sure to tell your guests about the traditional European inspiration behind this drink – it's a fantastic conversation starter!
Don't forget to store your remaining liqueur properly in a cool, dark place. It'll continue to develop more nuanced flavors over time, like a fine wine getting better with age.
And here's a fun tip: if you're feeling creative, try drizzling some of that leftover caramel in a zigzag pattern on a plate before setting your finished cocktail on top – it's like giving your drink its own little stage to shine!