As Halloween approaches, you’re probably thinking about how to make your celebration extra special this year. While costumes and decorations are important, don’t forget about the sweet treats that can truly elevate your spooky gathering. These five Halloween dessert recipes offer a perfect blend of seasonal flavors and eerie designs that’ll impress your guests and satisfy your sweet tooth. From rich brownies with a creepy twist to cookies that look like they’ve come straight from a witch’s cauldron, you’ll find something to suit every taste. But there’s more to these recipes than just their ghoulish appearance…
Spooky Spider Web Brownies

Spooky Spider Web Brownies are the perfect Halloween treat to impress your guests and satisfy your sweet tooth. These rich, fudgy brownies serve as a dark canvas for an intricate white chocolate spider web design, creating a visually striking dessert that’s both delicious and on-theme for the spookiest night of the year.
The beauty of this recipe lies in its simplicity and room for creativity. While the brownie base is straightforward and foolproof, the spider web decoration allows you to showcase your artistic skills. You can make the webs as simple or as elaborate as you like, and even add plastic spiders for an extra creepy touch.
- 1 cup unsalted butter
- 2 cups granulated sugar
- 4 large eggs
- 2 teaspoons vanilla extract
- 1 cup unsweetened cocoa powder
- 1 cup all-purpose flour
- 1/2 teaspoon salt
- 1/2 cup white chocolate chips
Preheat the oven to 350°F and line a 9×13-inch baking pan with parchment paper. In a microwave-safe bowl, melt the butter, then mix in the sugar, eggs, and vanilla. Sift in the cocoa powder, flour, and salt, stirring until just combined. Pour the batter into the prepared pan and bake for 25-30 minutes.
While the brownies cool, melt the white chocolate chips and transfer to a piping bag. Once the brownies are completely cool, pipe concentric circles onto the surface, then drag a toothpick from the center outward at regular intervals to create a web effect.
For best results, use high-quality cocoa powder and chocolate for a richer flavor. The brownies will continue to set as they cool, so be careful not to overbake them. If you prefer a more cake-like texture, you can add an extra 1/4 cup of flour to the batter.
To make the spider web design easier, you can practice on a piece of parchment paper before attempting it on the brownies. If you make a mistake, simply smooth it out with a spatula and try again.
For added visual impact, consider dusting the edges of the brownies with powdered sugar or adding edible glitter to make your spooky creation truly shine.
Pumpkin Spice Cake Pops

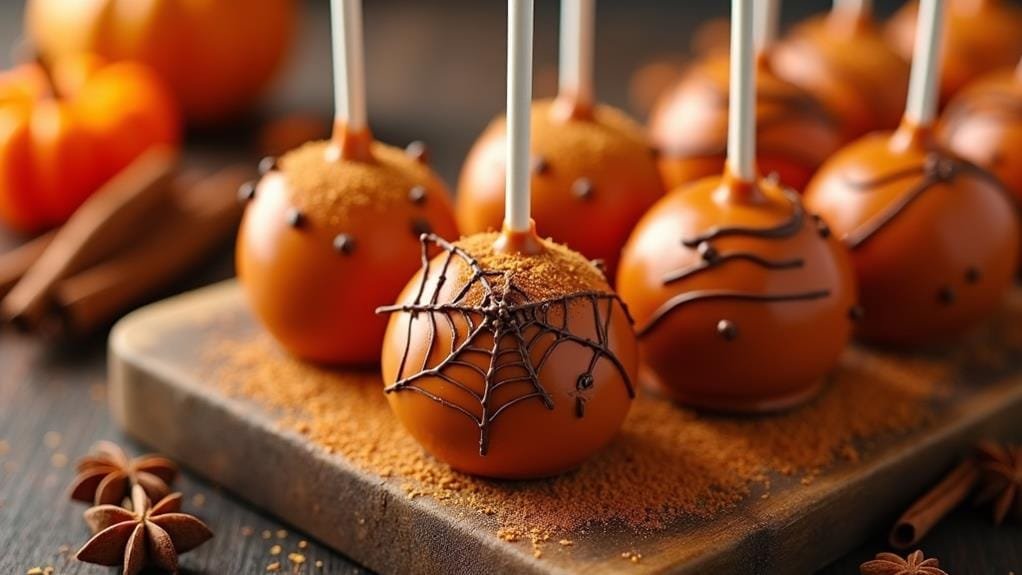
Pumpkin Spice Cake Pops are a delightful and festive treat perfect for Halloween parties or autumn gatherings. These bite-sized confections combine the warm, comforting flavors of pumpkin and spices with the fun, portable nature of cake pops. The moist pumpkin cake is crumbled and mixed with cream cheese frosting, then shaped into balls and dipped in white chocolate for a sweet and creamy exterior.
These adorable pops can be decorated in various ways to fit your Halloween theme. You can use orange-tinted white chocolate for a classic pumpkin look, or get creative with spooky faces, spider webs, or other Halloween motifs. The possibilities are endless, making this recipe a versatile addition to your Halloween dessert repertoire.
- 1 box spice cake mix
- 1 can (15 oz) pumpkin puree
- 3 eggs
- 1/3 cup vegetable oil
- 1 cup cream cheese frosting
- 24 oz white chocolate chips
- 1 tablespoon vegetable shortening
- Lollipop sticks
- Orange food coloring (optional)
- Sprinkles or other decorations (optional)
Preheat the oven to 350°F (175°C). In a large bowl, mix the cake mix, pumpkin puree, eggs, and oil until well combined. Pour the batter into a greased 9×13-inch baking pan and bake for 25-30 minutes or until a toothpick inserted in the center comes out clean. Allow the cake to cool completely, then crumble it into a large bowl.
Mix in the cream cheese frosting until the mixture is moist enough to hold together when shaped. Form the mixture into 1-inch balls and place them on a baking sheet lined with parchment paper. Chill in the freezer for 15 minutes. Melt the white chocolate chips with the shortening in a microwave-safe bowl, stirring every 30 seconds until smooth.
Dip one end of each lollipop stick into the melted chocolate, then insert it into a cake ball. Dip each cake pop into the melted chocolate, allowing excess to drip off, and place upright in a styrofoam block to set.
For best results, make sure your cake balls are very cold before dipping them in the chocolate. This will help the chocolate set quickly and prevent the cake pops from falling off the sticks. If the melted chocolate starts to thicken as you’re working, reheat it in short bursts in the microwave, stirring well each time.
To create a smooth, professional-looking finish on your cake pops, tap the stick gently on the side of the bowl after dipping to remove excess chocolate. You can also experiment with different decorating techniques, such as drizzling contrasting colors of chocolate over the pops, adding sprinkles while the chocolate is still wet, or using edible markers to draw faces or designs once the chocolate has set.
Store the finished cake pops in an airtight container in the refrigerator for up to a week, or at room temperature for 2-3 days.
Candy Corn Cupcakes

Candy Corn Cupcakes are a festive and colorful treat perfect for Halloween parties or autumn gatherings. These eye-catching cupcakes mimic the iconic tri-color design of candy corn, with layers of orange, yellow, and white cake topped with a swirl of creamy frosting. The result is a visually striking dessert that captures the essence of the season.
Not only do these cupcakes look impressive, but they also taste delicious. The light and fluffy vanilla cake base provides the perfect canvas for the vibrant food coloring, while the sweet buttercream frosting adds a rich, indulgent finish. Whether you’re a seasoned baker or a novice in the kitchen, these Candy Corn Cupcakes are sure to be a hit with both kids and adults alike.
- 2 1/4 cups all-purpose flour
- 2 1/2 teaspoons baking powder
- 1/4 teaspoon salt
- 1 cup unsalted butter, softened
- 1 1/2 cups granulated sugar
- 3 large eggs
- 2 teaspoons vanilla extract
- 1 cup milk
- Orange and yellow food coloring
- 1 cup unsalted butter, softened (for frosting)
- 4 cups powdered sugar (for frosting)
- 2-3 tablespoons milk (for frosting)
- 1 teaspoon vanilla extract (for frosting)
Preheat the oven to 350°F and line a muffin tin with cupcake liners. In a bowl, whisk together flour, baking powder, and salt. In a separate large bowl, cream butter and sugar until light and fluffy. Beat in eggs one at a time, then add vanilla. Gradually mix in the dry ingredients, alternating with milk.
Divide the batter into three portions, leaving one white, coloring one yellow, and one orange. Layer the batters in the cupcake liners, starting with orange at the bottom, then yellow, and finally white on top. Bake for 18-20 minutes or until a toothpick comes out clean.
For the frosting, beat butter until creamy, then gradually add powdered sugar, milk, and vanilla until smooth. Once cupcakes are cool, pipe frosting on top.
For the most vibrant colors, use gel food coloring instead of liquid. This will give you more intense hues without affecting the consistency of the batter. When layering the colors, try to keep them as even as possible for the best candy corn effect. You can use a small ice cream scoop or tablespoon to measure out each layer consistently.
To make your Candy Corn Cupcakes even more festive, consider adding a candy corn on top of each frosted cupcake as a garnish. You can also experiment with different frosting techniques, such as creating a swirl that mimics the tri-color pattern of the cake.
For a fun twist, you could even add a candy corn-flavored extract to the frosting to enhance the theme. Remember, the key to perfect cupcakes isn’t overmixing the batter and avoiding overbaking, so keep a close eye on them in the oven.
Ghostly Meringue Cookies

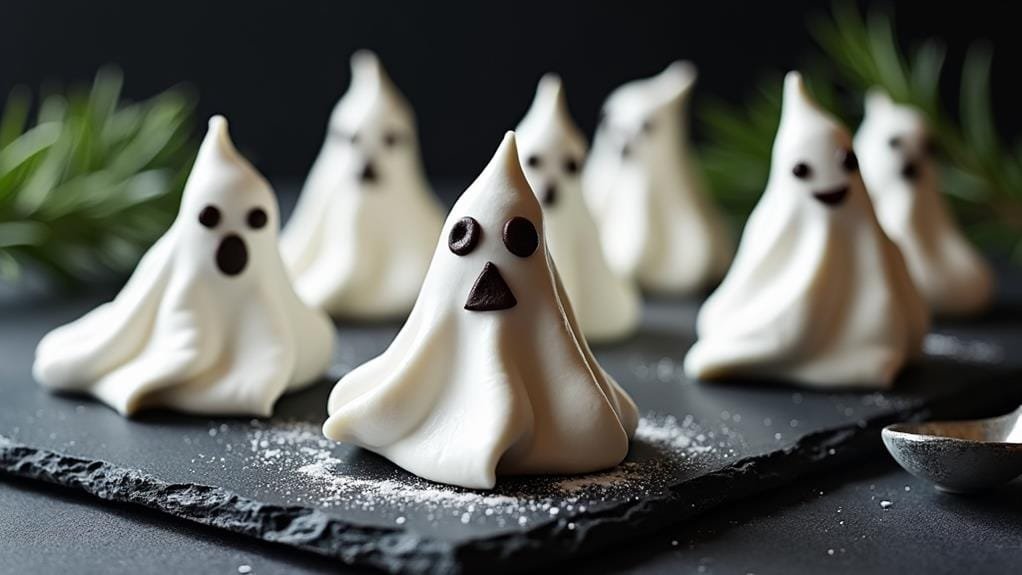
Ghostly Meringue Cookies are a delightful and eerie addition to any Halloween dessert spread. These light, airy treats are shaped to resemble cute little ghosts, complete with spooky expressions. The crisp exterior gives way to a melt-in-your-mouth interior, making them irresistible to both kids and adults alike.
What makes these cookies particularly appealing is their versatility. You can customize the ghost faces to be as friendly or as frightening as you like, using melted chocolate or black food coloring to create the eyes and mouths. They’re also naturally gluten-free, making them a great option for guests with dietary restrictions.
- 4 large egg whites, at room temperature
- 1 cup granulated sugar
- 1/4 teaspoon cream of tartar
- 1 teaspoon vanilla extract
- 1/4 cup semi-sweet chocolate chips, melted (for decorating)
Preheat the oven to 200°F (95°C) and line two baking sheets with parchment paper. In a clean, dry bowl, beat the egg whites on medium speed until foamy. Add the cream of tartar and continue beating while gradually adding the sugar. Increase the speed to high and beat until stiff, glossy peaks form and the mixture is cool to the touch, about 5-7 minutes. Gently fold in the vanilla extract.
Transfer the meringue to a piping bag fitted with a large round tip and pipe ghost shapes onto the prepared baking sheets. Bake for 2 hours, then turn off the oven and let the meringues cool completely inside without opening the door, preferably overnight.
For best results, make sure your bowl and beaters are completely clean and free from any grease, as this can prevent the egg whites from whipping properly. It’s also important to avoid making these cookies on a humid day, as moisture in the air can affect the texture and drying time of the meringues.
To create more defined ghost shapes, you can draw outlines on the parchment paper before piping. Simply flip the paper over so you’re not piping directly onto the pencil marks. For added flavor variations, consider adding a small amount of almond or peppermint extract to the meringue mixture.
Once the ghosts are completely cool and dry, use the melted chocolate to pipe on faces, or get creative with edible markers or food coloring for more detailed expressions.
Witches’ Finger Cookies

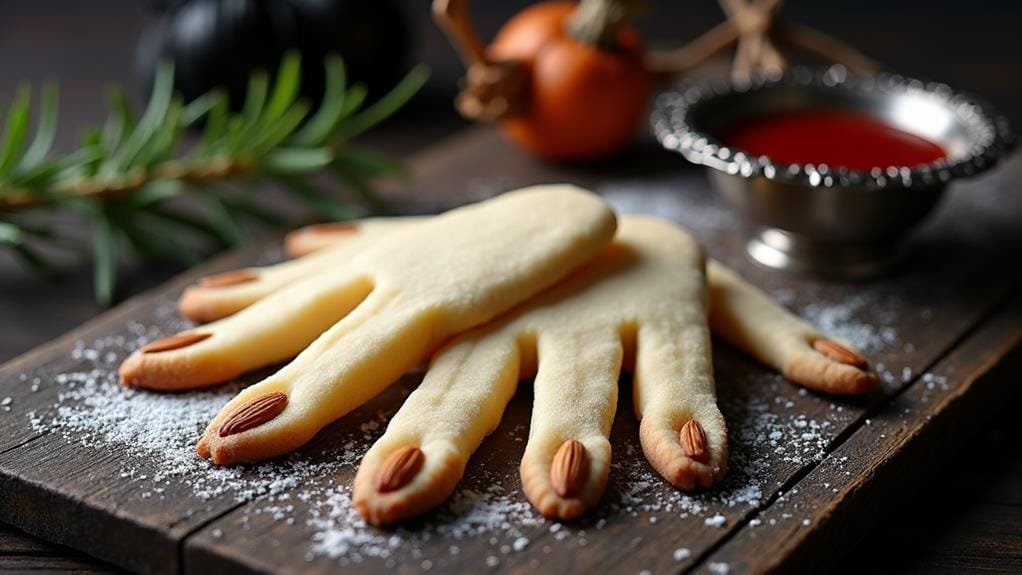
Witches’ Finger Cookies are a delightfully creepy Halloween treat that’s sure to give your guests a fright. These eerie, finger-shaped cookies are made with a simple sugar cookie dough, shaped to resemble gnarled witch fingers, complete with almond “fingernails” and knuckle indentations for a realistic touch.
These spooky treats aren’t only visually striking but also delicious, with a buttery vanilla flavor that pairs perfectly with the slight nuttiness of the almond fingernails. The cookies can be customized with food coloring for an even more ghastly appearance, and you can experiment with different nut varieties or candy decorations for the nails.
- 1 cup unsalted butter, softened
- 1 cup powdered sugar
- 1 large egg
- 1 teaspoon vanilla extract
- 2 3/4 cups all-purpose flour
- 1 teaspoon salt
- 1/4 teaspoon baking powder
- 1/4 cup sliced almonds
- Red food coloring (optional)
In a large bowl, cream together the butter and powdered sugar until light and fluffy. Beat in the egg and vanilla extract.
In a separate bowl, whisk together the flour, salt, and baking powder. Gradually add the dry ingredients to the wet mixture, mixing until a soft dough forms. If desired, add a few drops of red food coloring for a more gruesome effect. Chill the dough for 30 minutes.
Preheat the oven to 325°F (165°C). Shape the dough into finger-like shapes, about 3 inches long, and place on a lined baking sheet. Use a knife to make knuckle indentations. Press a sliced almond onto one end of each cookie to create a fingernail. Bake for 20-25 minutes until lightly golden. Allow to cool completely on the baking sheet.
For an extra realistic touch, you can use a toothpick to create small lines and wrinkles on the fingers after shaping the dough. This will give the appearance of skin texture when baked.
If you find the dough too soft to work with, simply return it to the refrigerator for a few minutes to firm up. You can also use green food coloring instead of red for a different witch-like effect.
To make these cookies even more interactive, consider serving them alongside a “blood” dipping sauce made from raspberry jam or red-tinted vanilla frosting. This not only adds to the creepy factor but also provides an additional flavor element.
For a nut-free version, you can use candy corn or pumpkin seeds as an alternative to the almond fingernails. Remember, the key to making these cookies truly frightful is in the details, so don’t be afraid to get creative with your decorating techniques.


