As you prepare for Halloween festivities, why not elevate your dessert game with some spooktacular brownies? These five recipes offer a perfect blend of creativity and flavor, ensuring your treats will be the talk of any gathering. From the visually striking Spider Web Brownies to the layered delight of Candy Corn Brownies, there’s something to satisfy every sweet tooth. You’ll find options that cater to various skill levels and time constraints, allowing you to choose the perfect recipe for your needs. But before you plunge into the kitchen, you might want to reflect on which of these tempting treats will best suit your Halloween celebration.
Spooky Spider Web Brownies
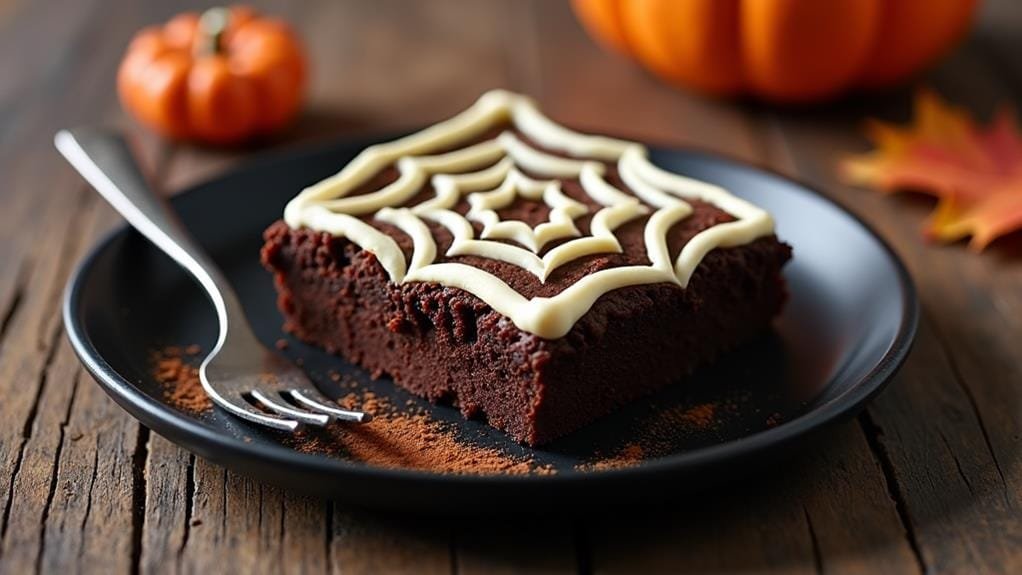
Spooky Spider Web Brownies are a perfect Halloween treat that combines rich, fudgy chocolate brownies with a creamy cream cheese topping. The spider web design is created by swirling the cream cheese mixture into the brownie batter, resulting in a visually striking dessert.
These brownies aren’t only delicious but also easy to make, making them an ideal choice for Halloween parties or gatherings. The contrast between the dark chocolate brownie and the white cream cheese topping creates a spooky effect that’s sure to impress your guests.
- 1/2 cup unsalted butter
- 1 cup granulated sugar
- 2 large eggs
- 1 teaspoon vanilla extract
- 1/3 cup unsweetened cocoa powder
- 1/2 cup all-purpose flour
- 1/4 teaspoon salt
- 4 oz cream cheese, softened
- 1/4 cup powdered sugar
Preheat the oven to 350°F and line an 8-inch square baking pan with parchment paper. In a microwave-safe bowl, melt the butter and mix in the sugar, eggs, and vanilla. Stir in the cocoa powder, flour, and salt until well combined. Pour the batter into the prepared pan.
In a separate bowl, beat the cream cheese and powdered sugar until smooth. Drop spoonfuls of the cream cheese mixture over the brownie batter and use a knife to swirl it into a spider web pattern. Bake for 25-30 minutes or until a toothpick inserted in the center comes out with a few moist crumbs.
For best results, verify all ingredients are at room temperature before starting. This will help them mix together more easily and create a smoother batter. If you’re having trouble creating the spider web design, try using a toothpick instead of a knife for more precise swirls.
To enhance the Halloween theme, consider adding some edible candy eyes or plastic spider rings as decorations after the brownies have cooled. These brownies can be stored in an airtight container at room temperature for up to 3 days, or in the refrigerator for up to a week.
For an extra indulgent treat, serve them slightly warm with a scoop of vanilla ice cream.
Pumpkin Swirl Brownies
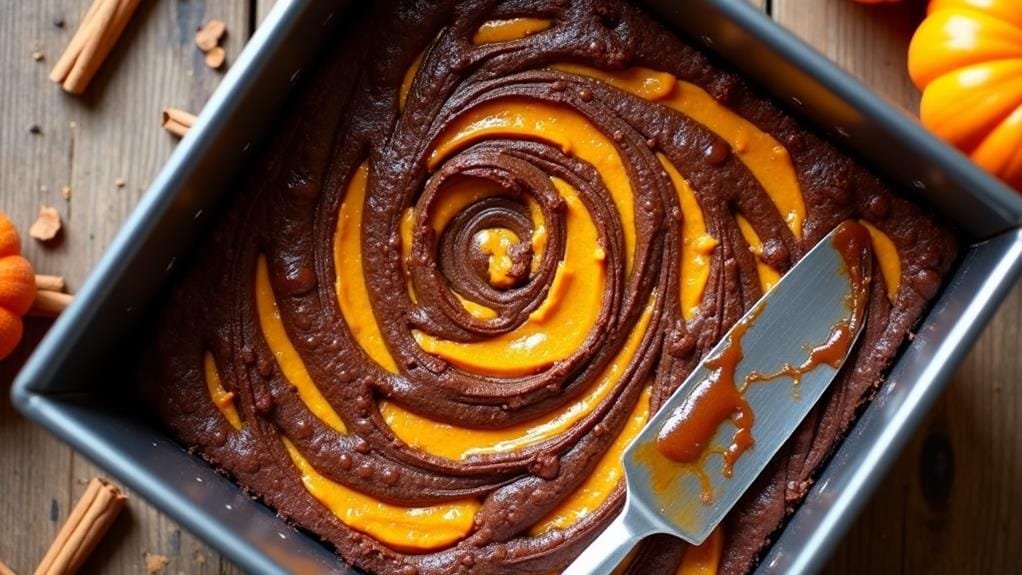
Pumpkin Swirl Brownies are a delightful autumn twist on the classic chocolate treat. These brownies combine the rich, fudgy texture of chocolate with the warm, comforting flavors of pumpkin and spices. The striking orange swirls not only add a festive touch perfect for Halloween but also contribute to a moist, tender crumb that will have everyone reaching for seconds.
This recipe creates a perfect balance between chocolate and pumpkin, ensuring neither flavor overpowers the other. The addition of pumpkin pie spice enhances the seasonal appeal, while the cream cheese in the pumpkin mixture adds a subtle tanginess that complements the sweetness of the brownies. The marbled effect isn’t only visually appealing but also provides a delightful variation in flavor with each bite.
- 3/4 cup unsalted butter
- 1 1/2 cups granulated sugar
- 3 large eggs
- 1 teaspoon vanilla extract
- 3/4 cup unsweetened cocoa powder
- 3/4 cup all-purpose flour
- 1/2 teaspoon salt
- 8 oz cream cheese, softened
- 1 cup canned pumpkin puree
- 1/4 cup granulated sugar
- 1 egg
- 1 teaspoon pumpkin pie spice
Preheat the oven to 350°F (175°C) and line a 9-inch square baking pan with parchment paper. In a microwave-safe bowl, melt the butter and mix in 1 1/2 cups sugar, 3 eggs, and vanilla. Stir in cocoa powder, flour, and salt until well combined. Pour the batter into the prepared pan.
In a separate bowl, beat cream cheese, pumpkin puree, 1/4 cup sugar, 1 egg, and pumpkin pie spice until smooth. Drop spoonfuls of the pumpkin mixture over the brownie batter and use a knife to swirl it into a marbled pattern. Bake for 35-40 minutes or until a toothpick inserted in the center comes out with a few moist crumbs.
For the best pumpkin flavor, use canned pumpkin puree rather than pumpkin pie filling, which contains added sugars and spices. If you prefer a stronger pumpkin taste, you can increase the amount of pumpkin pie spice or add individual spices like cinnamon, nutmeg, and ginger to taste.
Be careful not to overmix the batters when creating the swirl pattern, as this can lead to a muddy appearance and less distinct flavor separation. To achieve the perfect fudgy texture, be sure not to overbake the brownies. They may appear slightly underbaked when you remove them from the oven, but they’ll continue to set as they cool.
For clean cuts, allow the brownies to cool completely before slicing, and use a sharp knife wiped clean between each cut. These brownies can be stored in an airtight container at room temperature for up to 3 days, or in the refrigerator for up to a week. They also freeze well for up to 3 months, making them a great make-ahead treat for Halloween parties or autumn gatherings.
Candy Corn Brownies
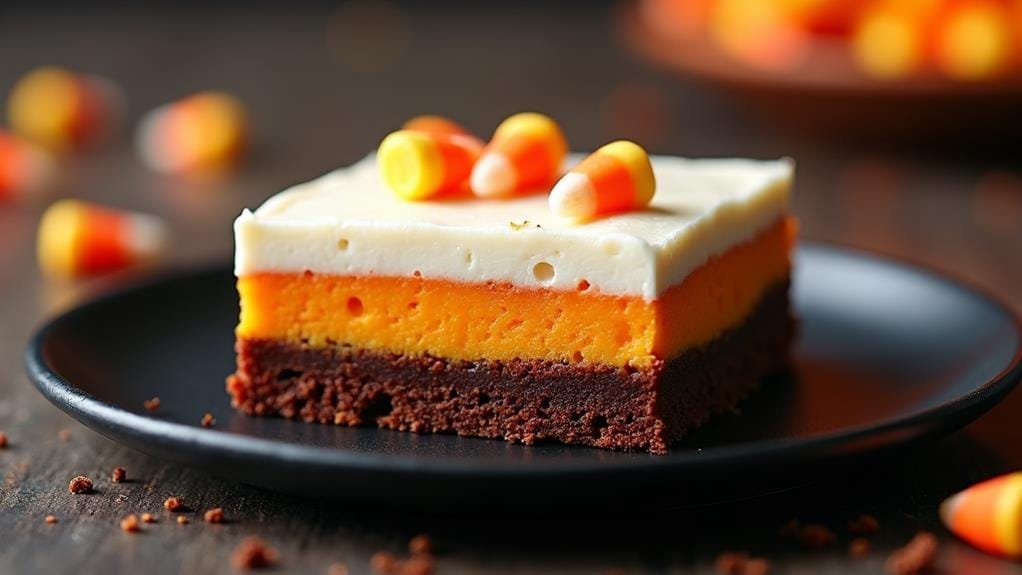
Candy Corn Brownies are a festive twist on the classic chocolate treat, perfect for Halloween celebrations. These brownies combine the rich, fudgy texture of a traditional brownie with the iconic flavors and colors of candy corn, creating a visually stunning and delicious dessert.
The secret to these eye-catching brownies lies in the layered approach. A classic chocolate brownie base is topped with a vibrant orange layer and finished with a creamy white chocolate layer, mimicking the tri-color appearance of candy corn. The result is a harmonious blend of chocolate and vanilla flavors with a hint of candy corn sweetness.
- 1 cup unsalted butter
- 2 cups granulated sugar
- 4 large eggs
- 2 teaspoons vanilla extract
- 1 cup unsweetened cocoa powder
- 1 cup all-purpose flour
- 1/2 teaspoon salt
- 1 cup white chocolate chips
- 1/2 cup heavy cream
- Orange food coloring
- 1 cup candy corn
Preheat the oven to 350°F (175°C) and line a 9×13-inch baking pan with parchment paper. In a microwave-safe bowl, melt the butter and mix in the sugar, eggs, and vanilla. Stir in the cocoa powder, flour, and salt until well combined. Pour the batter into the prepared pan and bake for 25-30 minutes.
While the brownies are cooling, melt the white chocolate chips with heavy cream in a double boiler. Divide the mixture in half, adding orange food coloring to one portion. Once the brownies are completely cool, spread the orange layer over the brownies, followed by the white layer. Sprinkle candy corn on top and refrigerate until set.
For best results, allow the brownies to cool completely before adding the candy corn-inspired layers. This will prevent the chocolate layers from melting and guarantee clean, distinct colors. If you find the white chocolate mixture too thick to spread easily, add a little more heavy cream to thin it out. Be careful not to overheat the white chocolate, as it can easily burn or seize.
To achieve a more intense candy corn flavor, consider adding a teaspoon of honey to the orange layer and a drop of vanilla extract to the white layer. This will enhance the candy corn essence without overpowering the chocolate base.
For a fun presentation, cut the brownies into triangles to resemble actual candy corn pieces. These brownies can be stored in an airtight container in the refrigerator for up to a week, making them an excellent make-ahead dessert for Halloween parties.
Graveyard Dirt Brownies
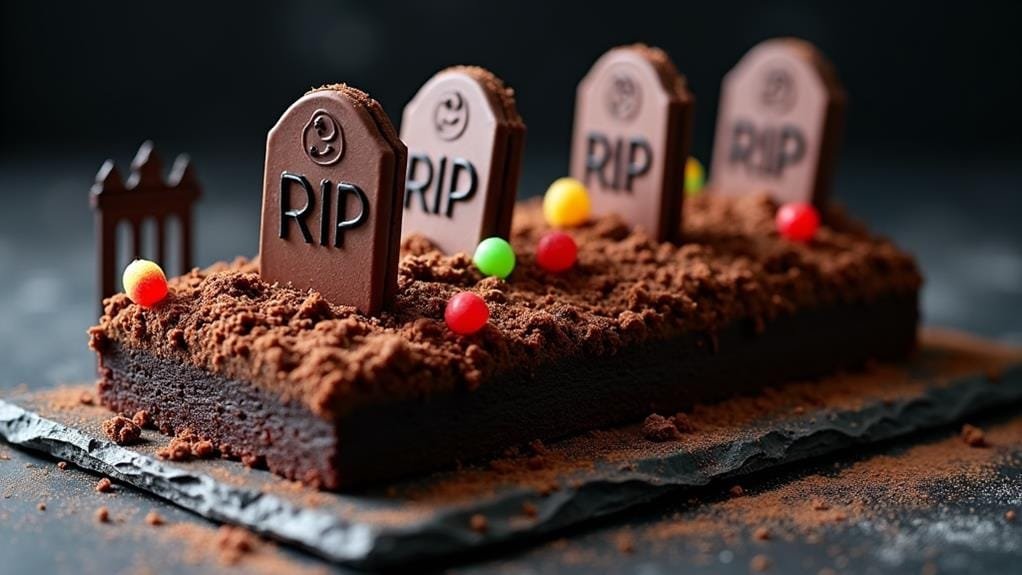
Graveyard Dirt Brownies are a delightfully spooky twist on the classic chocolate treat, perfect for Halloween parties or fall gatherings. These rich, fudgy brownies are topped with a layer of crushed chocolate cookies to resemble dirt, and decorated with candy “tombstones” and gummy worms to create a miniature edible graveyard scene.
This recipe combines the indulgent taste of homemade brownies with the fun and creativity of Halloween-themed decorations. The contrast between the moist, chocolatey base and the crunchy cookie topping provides a satisfying texture, while the playful decorations add a touch of whimsy to this dessert.
- 1 cup unsalted butter
- 2 cups granulated sugar
- 4 large eggs
- 2 teaspoons vanilla extract
- 1 cup unsweetened cocoa powder
- 1 cup all-purpose flour
- 1/2 teaspoon salt
- 1 package chocolate sandwich cookies, crushed
- Milano cookies or rectangular shortbread cookies
- Black decorating gel
- Gummy worms
Preheat the oven to 350°F (175°C) and line a 9×13-inch baking pan with parchment paper. In a microwave-safe bowl, melt the butter and mix in the sugar. Add eggs one at a time, then stir in vanilla. In a separate bowl, combine cocoa powder, flour, and salt. Gradually add the dry ingredients to the wet mixture, stirring until just combined.
Pour the batter into the prepared pan and bake for 30-35 minutes, or until a toothpick inserted in the center comes out with a few moist crumbs. Allow to cool completely before decorating.
For best results, make sure to crush the chocolate sandwich cookies into fine crumbs to create a realistic “dirt” effect. You can use a food processor or place the cookies in a sealed plastic bag and crush them with a rolling pin. When writing on the “tombstone” cookies with black gel, allow the icing to dry completely before inserting them into the brownies to prevent smudging.
To assemble the graveyard scene, sprinkle the crushed cookies over the cooled brownies, covering the entire surface. Use the black decorating gel to write “RIP” or other spooky messages on the Milano or shortbread cookies, then gently insert them into the brownie “dirt” at various angles.
Witch’s Cauldron Brownies
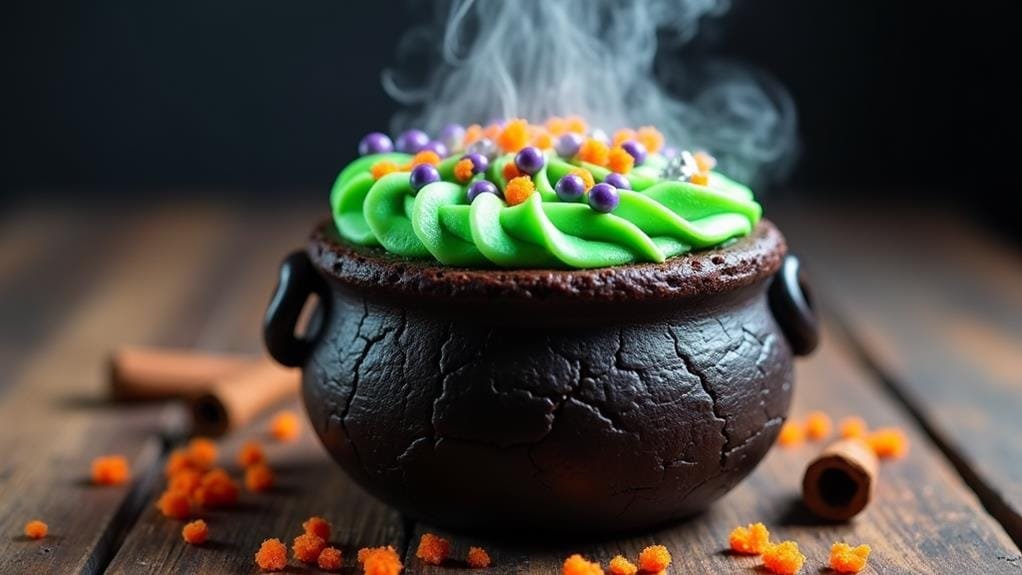
Witch’s Cauldron Brownies are a delightful Halloween treat that combines rich, fudgy brownies with a spooky twist. These brownies are baked in small, cauldron-shaped molds or ramekins to resemble miniature witch’s cauldrons, perfect for any Halloween gathering or party.
The brownies are made with a dark chocolate base, giving them a deep, intense flavor that pairs wonderfully with the vibrant green “potion” frosting on top. The frosting is tinted with food coloring to achieve the perfect hue, and can be decorated with edible sprinkles or candy pieces to resemble bubbling potions or magical ingredients.
- 1 cup unsalted butter
- 2 cups granulated sugar
- 4 large eggs
- 2 teaspoons vanilla extract
- 1 cup unsweetened cocoa powder
- 1 cup all-purpose flour
- 1/2 teaspoon salt
- 1/2 cup chocolate chips
- 2 cups vanilla frosting
- Green food coloring
- Assorted Halloween sprinkles or candies
Preheat the oven to 350°F (175°C) and grease 12 small cauldron-shaped molds or ramekins. In a microwave-safe bowl, melt the butter and mix in the sugar. Add eggs one at a time, then stir in vanilla.
In a separate bowl, combine cocoa powder, flour, and salt. Gradually add the dry ingredients to the wet mixture, stirring until just combined. Fold in chocolate chips. Divide the batter among the prepared molds and bake for 20-25 minutes, or until a toothpick inserted in the center comes out with a few moist crumbs. Allow to cool completely.
Mix green food coloring into the vanilla frosting until desired color is achieved. Pipe or spread the green frosting onto the cooled brownies and decorate with sprinkles or candies to resemble a bubbling potion.
For best results, use dark cocoa powder to achieve a rich, intense chocolate flavor that contrasts well with the bright green frosting. If you don’t have cauldron-shaped molds, you can use regular muffin tins and create a cauldron effect by piping the green frosting in a mound on top of each brownie.
To enhance the cauldron effect, consider adding handles made from black licorice or twisted fondant. You can also create a smoky effect by placing dry ice in a separate container near the brownies when serving, but be sure to handle dry ice with caution and keep it out of reach of children.
These brownies can be made a day in advance and stored in an airtight container at room temperature, but add the frosting and decorations just before serving for the best appearance.

