Picture a kitchen filled with the warm, spicy aroma of freshly baked cookies, their shapes and colors evoking the eerie charm of Halloween. You’re about to discover five exceptional recipes that’ll transform your baking into a festive adventure. From pumpkin-spiced delights to creepy witch fingers, these treats aren’t just tasty—they’re conversation starters. You’ll learn techniques to create intricate designs and perfect textures, ensuring your cookies are as visually stunning as they are delicious. But there’s more to these recipes than meets the eye. Each one holds a secret that’ll elevate your Halloween celebrations to a whole new level.
Spooky Pumpkin Spice Cookies

Spooky Pumpkin Spice Cookies
As the crisp autumn air settles in and jack-o’-lanterns start to appear on doorsteps, it’s time to embrace the spirit of Halloween with some deliciously spooky treats. These Spooky Pumpkin Spice Cookies are the perfect way to celebrate the season, combining the warm flavors of pumpkin and aromatic spices with a playful Halloween twist.
These soft and chewy cookies aren’t only a treat for the taste buds but also a feast for the eyes. With their vibrant orange hue and creative decorations, they’re sure to be a hit at any Halloween party or gathering. The pumpkin puree adds moisture and a subtle earthiness, while the blend of spices creates a comforting aroma that will fill your kitchen with the essence of fall.
- 2 1/4 cups all-purpose flour
- 1 teaspoon baking soda
- 1 teaspoon pumpkin pie spice
- 1/2 teaspoon salt
- 1 cup unsalted butter, softened
- 3/4 cup brown sugar
- 1/2 cup granulated sugar
- 1 cup canned pumpkin puree
- 1 large egg
Preheat the oven to 350°F (175°C). In a medium bowl, whisk together the flour, baking soda, pumpkin pie spice, and salt. In a large bowl, cream the butter and sugars until light and fluffy. Beat in the pumpkin puree and egg until well combined.
Gradually stir the dry ingredients into the wet mixture until just blended. Drop rounded tablespoons of dough onto ungreased baking sheets, spacing them about 2 inches apart. Bake for 12-15 minutes, or until the edges are lightly browned. Allow cookies to cool on the baking sheets for 5 minutes before transferring to a wire rack to cool completely.
For a spookier touch, consider decorating your cooled cookies with Halloween-themed icing or sprinkles. You can create simple ghost faces using white icing and black gel for the eyes and mouth, or use orange icing to pipe jack-o’-lantern designs.
If you’re feeling particularly creative, try using food coloring to tint some of the cookie dough before baking, creating marbled effects or even multi-colored cookies.
To guarantee the best texture, avoid overmixing the dough once you’ve added the dry ingredients. Overmixing can lead to tough cookies. Additionally, if you find the dough too sticky to work with, refrigerate it for about 30 minutes before scooping and baking. This will make it easier to handle and help prevent the cookies from spreading too much during baking.
Witch’s Finger Shortbread
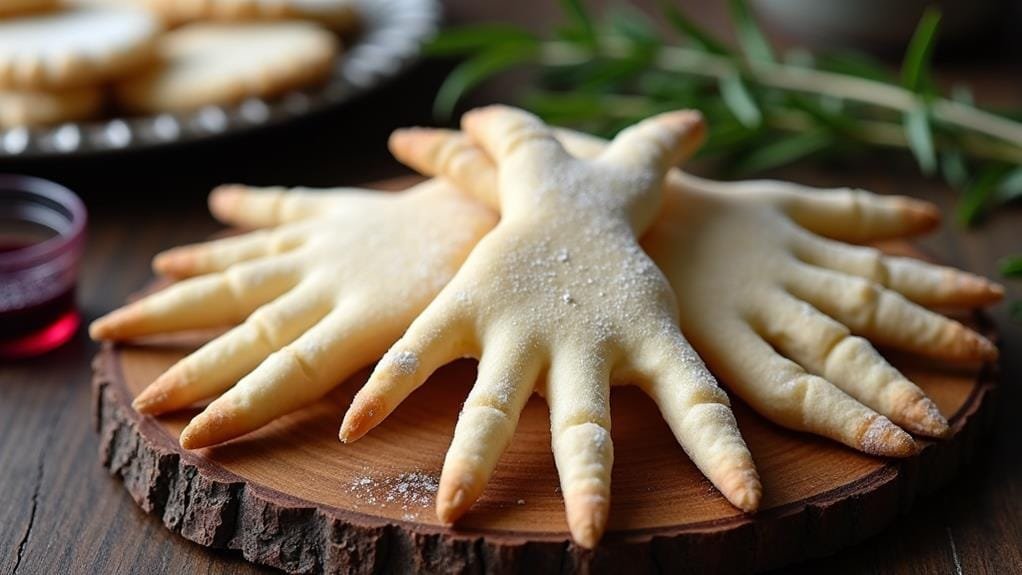
Witch’s Finger Shortbread cookies are a delightfully creepy addition to any Halloween spread. These eerie treats aren’t only visually striking but also deliciously buttery and crumbly, making them irresistible to both kids and adults alike. The pale, flesh-like color of the shortbread dough perfectly mimics the appearance of bony fingers, while strategically placed almond slivers create realistic-looking fingernails.
The beauty of these cookies lies in their simplicity and versatility. While the basic recipe creates a classic shortbread flavor, you can easily customize them by adding extracts like vanilla or almond for an extra flavor dimension. The dough is also forgiving, allowing you to shape and manipulate it into various finger-like forms, from long and slender to short and stubby, each with its own unique character.
- 2 cups all-purpose flour
- 1/4 teaspoon salt
- 1 cup unsalted butter, softened
- 2/3 cup powdered sugar
- 1 large egg
- 1 teaspoon vanilla extract
- 1/4 cup sliced almonds
- Red food coloring gel
In a large bowl, cream together the softened butter and powdered sugar until light and fluffy. Beat in the egg and vanilla extract. Gradually mix in the flour and salt until a soft dough forms.
Divide the dough into portions and roll each portion into a finger shape, about 3-4 inches long. Use a knife to make knuckle indentations. Press an almond slice at one end of each finger to create a nail. Place the fingers on a baking sheet lined with parchment paper and refrigerate for 30 minutes.
Preheat the oven to 325°F (165°C) and bake for 20-25 minutes, or until lightly golden. Let cool completely on the baking sheet.
For an extra gruesome touch, you can use red food coloring gel to add “blood” to the severed ends of the fingers after baking. Simply dab a small amount of the gel onto the end of each cooled cookie.
If you want to create a more realistic skin-like texture, try using a fork to gently press lines into the dough before baking, mimicking the wrinkles and creases of actual fingers.
To guarantee your witch’s fingers maintain their shape during baking, it’s essential to chill the shaped cookies before putting them in the oven. This helps prevent spreading and maintains the defined finger shape.
Additionally, if you find that the almond “nails” are browning too quickly during baking, you can cover them with small pieces of aluminum foil to protect them from excessive heat.
Chocolate Spider Web Cookies
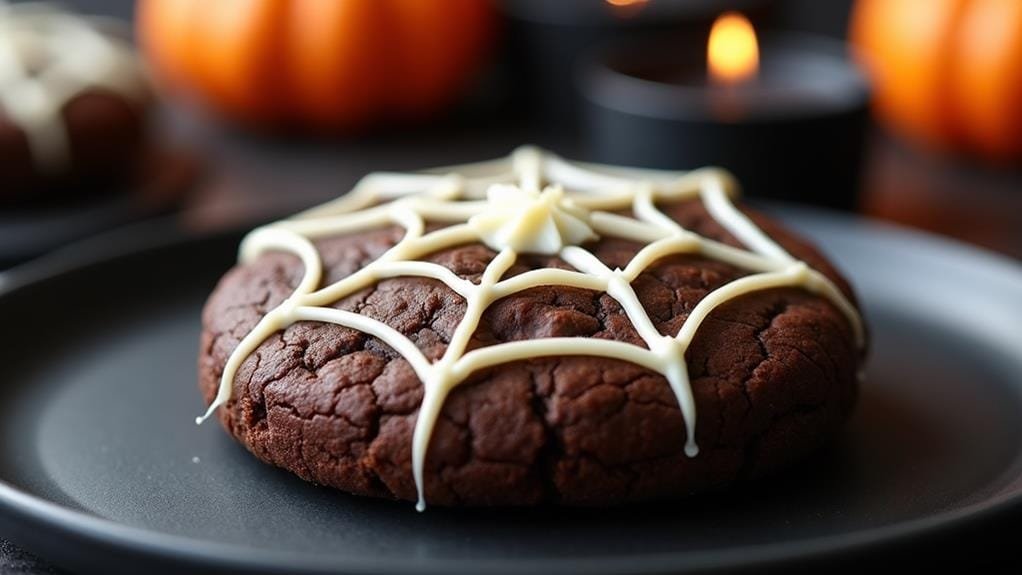
Chocolate Spider Web Cookies
As Halloween approaches, it’s time to add some eerie elegance to your cookie repertoire with these Chocolate Spider Web Cookies. These striking treats combine rich, dark chocolate flavors with intricate white chocolate web designs, creating a visually stunning and delicious dessert that’s perfect for any Halloween gathering or spooky celebration.
The deep, chocolatey base of these cookies provides the perfect canvas for the delicate spider web design. The contrast between the dark cookie and the white chocolate web not only looks impressive but also adds a delightful textural element to each bite. These cookies are sure to be a showstopper at your Halloween party, appealing to both the eyes and the taste buds of your guests.
- 2 1/4 cups all-purpose flour
- 3/4 cup unsweetened cocoa powder
- 1 teaspoon baking soda
- 1/2 teaspoon salt
- 1 cup unsalted butter, softened
- 1 cup granulated sugar
- 1 large egg
- 1 teaspoon vanilla extract
- 1/2 cup white chocolate chips
- 1 tablespoon vegetable oil
Preheat the oven to 350°F (175°C). In a medium bowl, whisk together flour, cocoa powder, baking soda, and salt. In a large bowl, cream butter and sugar until light and fluffy. Beat in egg and vanilla. Gradually stir the dry ingredients into the wet mixture until just combined.
Roll the dough into 1-inch balls and place on ungreased baking sheets. Flatten slightly with the palm of your hand. Bake for 10-12 minutes. Allow cookies to cool on the baking sheet for 5 minutes before transferring to a wire rack to cool completely.
To create the spider web design, melt the white chocolate chips with vegetable oil in a microwave-safe bowl, stirring every 30 seconds until smooth. Transfer the melted chocolate to a piping bag or a plastic bag with a small corner snipped off. Starting from the center of each cooled cookie, pipe concentric circles. Then, use a toothpick or a thin knife to drag lines from the center to the edge of the cookie, creating a web effect. Work quickly as the chocolate will start to set.
For best results, make sure your cookies are completely cooled before attempting to pipe the web design. If the cookies are still warm, the white chocolate will melt and lose its shape. If you find that your white chocolate is too thick for piping, you can add a little more vegetable oil to thin it out. Just be careful not to add too much, or the chocolate won’t set properly on the cookies.
Monster Eye Sugar Cookies
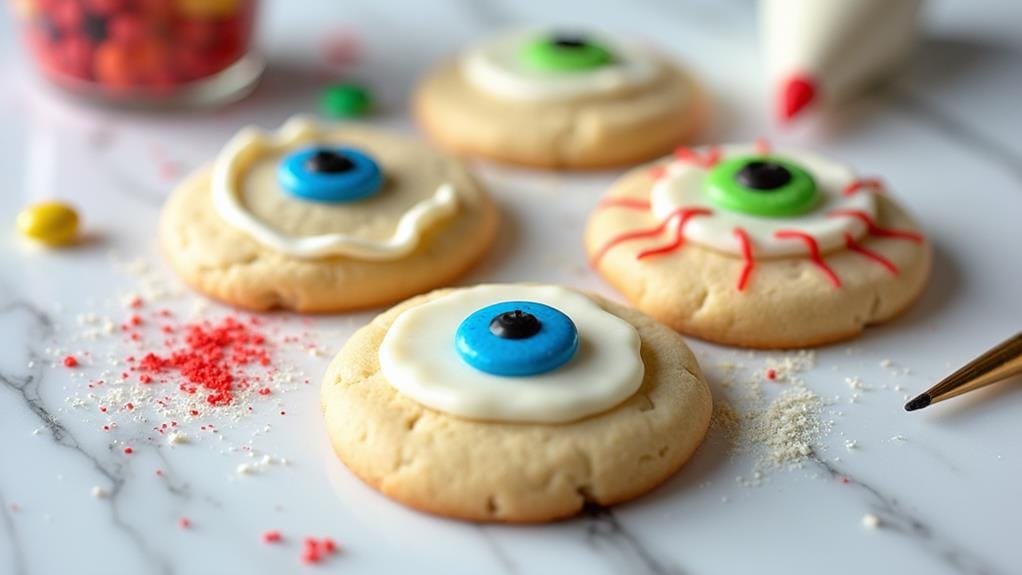
Monster Eye Sugar Cookies are a delightfully creepy treat perfect for Halloween parties or spooky gatherings. These cookies feature a classic sugar cookie base adorned with colorful candy “irises” and a glossy finish that mimics the eerie sheen of a real eye. The contrast between the sweet, buttery cookie and the candy decoration creates an irresistible combination that’s both tasty and visually striking.
What sets these cookies apart is their versatility in design. You can create a variety of eye colors and sizes, making each cookie unique. Whether you’re going for a jar of mismatched monster eyes or a uniform batch of otherworldly peepers, these cookies are sure to grab attention and satisfy sweet tooths alike.
- 2 3/4 cups all-purpose flour
- 1 teaspoon baking soda
- 1/2 teaspoon baking powder
- 1 cup unsalted butter, softened
- 1 1/2 cups white sugar
- 1 egg
- 1 teaspoon vanilla extract
- Assorted colors of round candies (like M&Ms or Skittles)
- White chocolate chips
- Black gel food coloring
In a large bowl, cream together the butter and sugar until smooth. Beat in the egg and vanilla extract. In a separate bowl, whisk together the flour, baking soda, and baking powder. Gradually blend the dry ingredients into the butter mixture.
Roll the dough into 1-inch balls and place on ungreased cookie sheets. Flatten each ball slightly with the palm of your hand. Bake at 375°F for 8-10 minutes or until edges are lightly golden. Immediately after removing from the oven, press a round candy into the center of each cookie to create the “iris.” Let cool completely on wire racks.
For an extra creepy touch, melt white chocolate chips in the microwave and stir until smooth. Use a spoon to drizzle the melted chocolate over the cookies in a circular pattern around the candy “iris” to create the “whites” of the eyes. Before the chocolate sets, use a toothpick dipped in black gel food coloring to draw thin lines radiating from the iris, mimicking blood vessels. This step not only adds to the spooky effect but also helps to secure the candy in place.
To achieve the perfect eye shape, you can use the back of a spoon to create a slight indentation in the center of each cookie before baking. This will help guide the placement of the candy and create a more realistic eye shape. Additionally, experimenting with different sizes of candies and cookies can result in a variety of eye sizes, from small and beady to large and bulging, adding to the monster theme.
Candy Corn Swirl Cookies
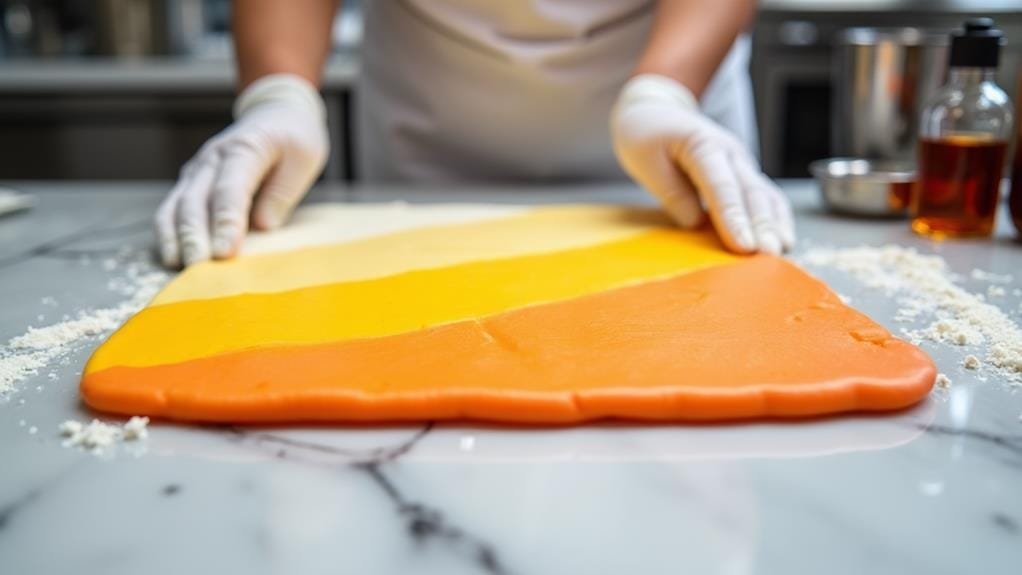
Candy Corn Swirl Cookies are a delightful treat that captures the essence of Halloween in every bite. These vibrant, swirled cookies not only look like the iconic candy corn but also bring a burst of festive colors to your Halloween dessert spread. The combination of vanilla and almond flavors creates a sweet, aromatic base that perfectly complements the playful appearance.
These cookies are made by dividing the dough into three portions and coloring them to mimic the classic yellow, orange, and white layers of candy corn. The dough is then carefully layered and rolled to create a mesmerizing swirl effect when sliced. The result is a batch of eye-catching cookies that are sure to impress both kids and adults alike at your Halloween gatherings.
- 3 cups all-purpose flour
- 1/2 teaspoon baking powder
- 1/4 teaspoon salt
- 1 cup unsalted butter, softened
- 1 1/3 cups granulated sugar
- 2 large eggs
- 2 teaspoons vanilla extract
- 1/2 teaspoon almond extract
- Yellow and orange food coloring
In a medium bowl, whisk together flour, baking powder, and salt. In a large bowl, cream butter and sugar until light and fluffy. Beat in eggs one at a time, then add vanilla and almond extracts. Gradually mix in the dry ingredients until just combined.
Divide the dough into three equal portions. Leave one portion white, color another yellow, and the third orange. Layer the colors in a loaf pan, cover with plastic wrap, and refrigerate for at least 2 hours. Once chilled, turn out the dough and slice into 1/4-inch thick cookies. Bake on parchment-lined baking sheets at 350°F for 10-12 minutes, until edges are lightly golden.
For the best swirl effect, make sure each layer of dough is even before adding the next color. You can use a rolling pin to gently press each layer flat in the loaf pan. If the dough becomes too soft while you’re working with it, return it to the refrigerator for a few minutes to firm up. This will make it easier to slice cleanly and maintain the swirl pattern.
To enhance the candy corn theme, consider shaping the dough into a triangle before refrigerating, mimicking the shape of actual candy corn. You can do this by forming each colored portion into a long rope and arranging them side by side in a triangle formation. Gently press the ropes together, then wrap and chill. When sliced, these cookies will have a distinctive candy corn shape that adds an extra touch of Halloween flair to your treats.


