Halloween is a time for spooky scares, but it’s also an opportunity for delicious treats. You’ve probably seen countless recipes for holiday snacks, yet these five stand out from the crowd. From the eerie elegance of a Spider Web Dip to the whimsical charm of Witches’ Fingers Breadsticks, each recipe offers a unique twist on Halloween fare. Whether you’re hosting a party or just enjoying a quiet night in, these snacks will elevate your celebration. But there’s more to these treats than meets the eye – they’re not just tasty, they’re conversation starters that’ll have your guests talking long after the last bite.
Spooky Spider Web Dip
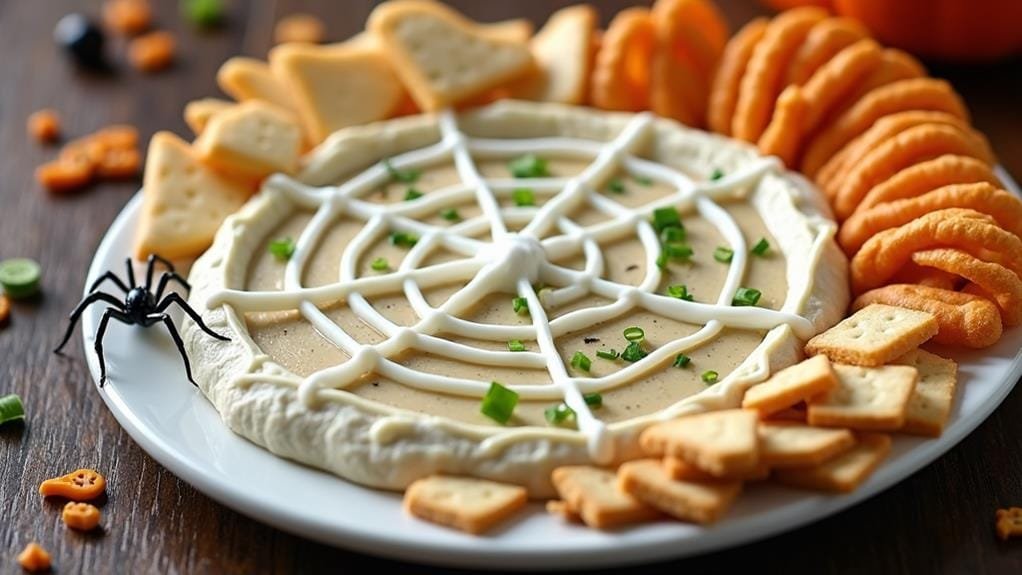
Spooky Spider Web Dip is a festive and delicious appetizer perfect for Halloween parties or autumn gatherings. This creamy dip features a blend of cream cheese, sour cream, and ranch seasoning, topped with an eye-catching spider web design that’s bound to impress your guests.
Not only is this dip visually striking, but it’s also incredibly easy to prepare. The combination of savory flavors and creamy texture makes it an irresistible crowd-pleaser. Serve it with an assortment of crackers, vegetables, or chips for a versatile snack that captures the spirit of the season.
- 16 oz cream cheese, softened
- 1 cup sour cream
- 1/4 cup mayonnaise
- 1 packet ranch seasoning mix
- 1/4 cup black olives, finely chopped
- 1/4 cup green onions, chopped
- 1/2 cup sour cream (for the web design)
- 1 plastic spider (optional, for decoration)
In a large bowl, mix the softened cream cheese, 1 cup of sour cream, mayonnaise, and ranch seasoning until smooth. Fold in the chopped black olives and green onions. Spread the mixture evenly in a circular serving dish.
For the web design, place the remaining 1/2 cup of sour cream in a piping bag or a zip-top bag with a small corner snipped off. Pipe concentric circles on top of the dip, starting from the center and working outward. Use a toothpick or knife tip to drag lines from the center to the edge, creating a web pattern. Refrigerate for at least an hour before serving.
For best results, verify all ingredients are at room temperature before mixing to achieve a smooth consistency. If you don’t have a piping bag, you can use a squeeze bottle or even a spoon to create the web design – just be patient and take your time for precise lines.
To add an extra spooky touch, place a plastic spider on the web or create one using a large black olive for the body and sliced olives for the legs.
To make this dip ahead of time, prepare the base mixture and refrigerate it separately from the sour cream for the web design. On the day of serving, spread the base in your serving dish and create the web pattern just before guests arrive. This will verify the design stays crisp and fresh.
Mummy Hot Dogs

Mummy Hot Dogs are a delightful and whimsical Halloween treat that combines the classic appeal of hot dogs with a spooky twist. These fun and easy-to-make snacks are perfect for Halloween parties, family gatherings, or a festive dinner leading up to the holiday. By wrapping hot dogs in strips of crescent roll dough, you create an eerie mummy-like appearance that’s guaranteed to captivate both children and adults alike.
What makes Mummy Hot Dogs particularly appealing is their versatility and simplicity. You can use any type of hot dog or sausage, making them adaptable to various dietary preferences. The crescent roll dough provides a flaky, golden exterior that complements the savory hot dog inside. With just a few ingredients and minimal preparation time, you can create a batch of these spooky snacks that are both visually impressive and delicious.
- 8 hot dogs
- 1 can (8 oz) refrigerated crescent roll dough
- 2 slices American cheese
- 1/4 cup ketchup
- 1/4 cup mustard
- Small candies or peppercorns for eyes
Preheat the oven to 375°F (190°C). Unroll the crescent roll dough and separate it into rectangles. Press the perforations to seal. Cut each rectangle lengthwise into 10 strips. Wrap 4 to 5 strips around each hot dog, stretching the dough slightly to resemble bandages and leaving a space for the face. Place the wrapped hot dogs on an ungreased baking sheet. Bake for 10-13 minutes or until the dough is light golden brown. Let cool for a few minutes, then add two small dots of mustard or place candies for eyes. Serve with ketchup and mustard for dipping.
For a cheesier version, cut each slice of American cheese into thin strips and wrap these around the hot dog before adding the dough. This will create a gooey, cheesy surprise inside the mummy wrapping. If you’re looking for a healthier alternative, consider using turkey hot dogs or veggie dogs. You can also experiment with different types of dough, such as puff pastry or pizza dough, for varied textures and flavors.
To make your Mummy Hot Dogs even more festive, consider creating a spooky dipping sauce. Mix ketchup with a small amount of green food coloring to create a “slime” dip, or use barbecue sauce for a “blood” effect. If you’re preparing these for a party, you can assemble the mummies ahead of time and refrigerate them, covered, for up to 4 hours before baking. This allows for easy preparation and guarantees you have more time to enjoy the Halloween festivities with your guests.
Pumpkin Spice Popcorn Balls
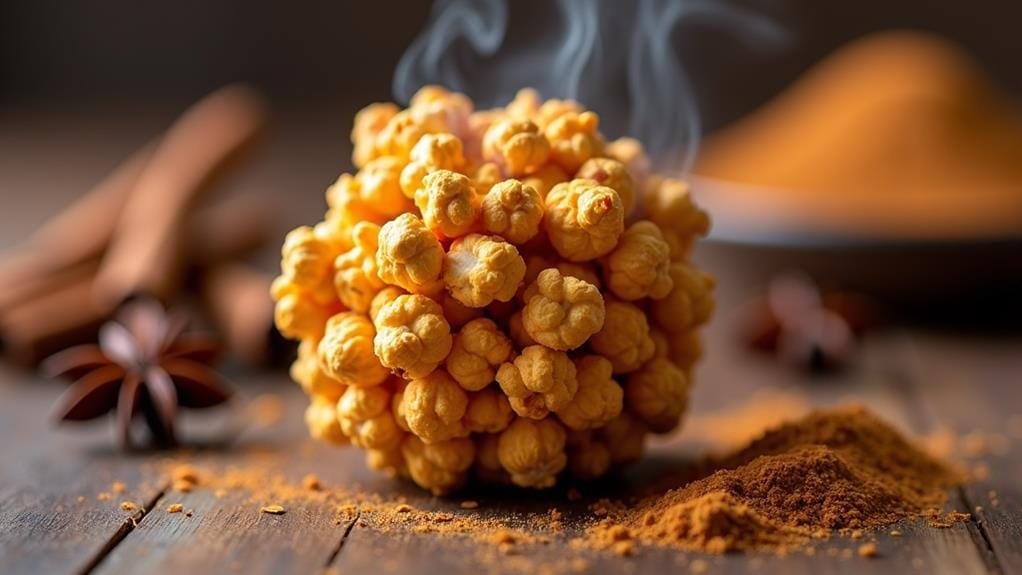
Pumpkin Spice Popcorn Balls are a delightful twist on the classic Halloween treat. These sweet and crunchy snacks combine the warm, comforting flavors of pumpkin spice with the nostalgic appeal of homemade popcorn balls. Perfect for autumn gatherings or Halloween parties, these treats are sure to be a hit with both kids and adults alike.
Not only are these popcorn balls tasty, but they also make for a fun and engaging cooking activity. The process of forming the sticky popcorn mixture into balls can be a great way to get children involved in the kitchen, creating memories while preparing a seasonal treat. The pumpkin spice flavor adds a festive touch that captures the essence of fall and Halloween.
- 12 cups popped popcorn
- 1 cup light corn syrup
- 1/2 cup unsalted butter
- 1 cup granulated sugar
- 1 tablespoon pumpkin pie spice
- 1/2 teaspoon salt
- 1 teaspoon vanilla extract
- Orange food coloring (optional)
In a large saucepan, combine the corn syrup, butter, sugar, pumpkin pie spice, and salt. Heat over medium heat, stirring constantly until the mixture comes to a boil. Continue boiling for 5 minutes without stirring. Remove from heat and stir in the vanilla extract and food coloring if using.
Pour the hot syrup over the popped popcorn in a large bowl, stirring gently to coat evenly. Allow the mixture to cool slightly, then shape into balls using buttered hands or a large ice cream scoop. Place the formed balls on wax paper to cool completely.
For best results, use freshly popped popcorn as it will be crispier and hold its shape better. If you find the mixture too sticky to work with, let it cool for a few more minutes or lightly butter your hands to prevent sticking. You can also add festive sprinkles or candy corn to the popcorn balls while they’re still warm for extra Halloween flair.
To store the popcorn balls, wrap them individually in plastic wrap or wax paper. They’ll keep at room temperature for up to a week. If you want to make them ahead of time, you can prepare the popcorn balls and freeze them for up to a month. Just be sure to thaw them at room temperature before serving.
For a more intense pumpkin flavor, you can add a tablespoon of pumpkin puree to the syrup mixture, but be aware that this may affect the texture and shelf life of the popcorn balls.
Ghostly Meringue Cookies
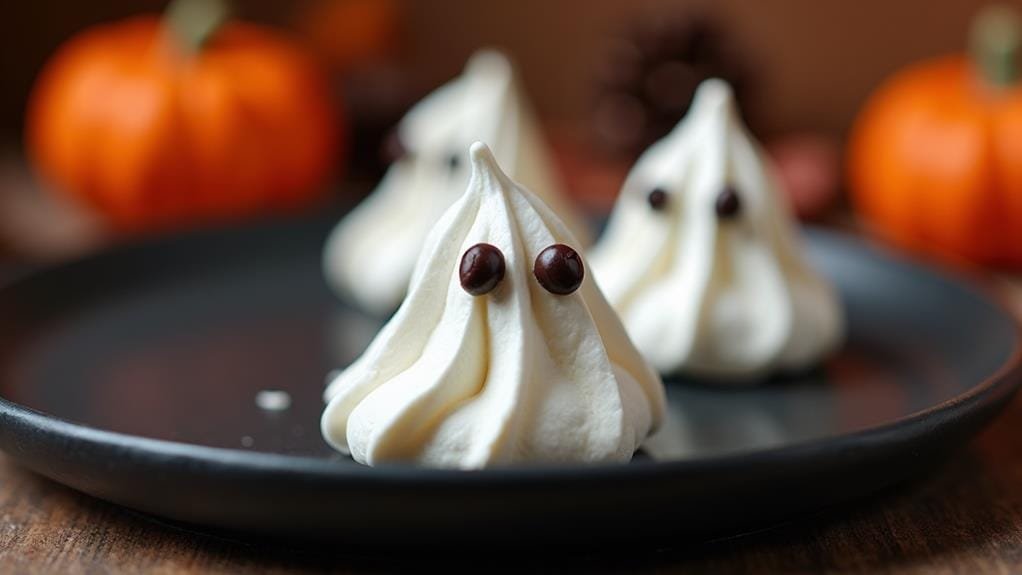
Ghostly Meringue Cookies are a delightful and spooky treat perfect for Halloween gatherings. These light, airy confections are shaped to resemble cute little ghosts, complete with chocolate chip eyes that add a touch of whimsy. The crisp exterior and melt-in-your-mouth interior make them irresistible to both children and adults.
Creating these ethereal treats is simpler than it might appear, requiring only a few basic ingredients and some piping skills. The key to success lies in achieving stiff peaks with the egg whites and sugar, which will allow the meringues to hold their shape during baking. Once mastered, this recipe can be easily adapted to create various ghostly shapes and sizes.
- 4 large egg whites, at room temperature
- 1 cup granulated sugar
- 1/4 teaspoon cream of tartar
- 1/2 teaspoon vanilla extract
- Mini chocolate chips for eyes
Preheat the oven to 200°F (95°C) and line two baking sheets with parchment paper. In a clean, dry bowl of a stand mixer fitted with the whisk attachment, beat the egg whites on medium speed until foamy. Add the cream of tartar and continue beating while gradually adding the sugar. Increase the speed to high and beat until stiff, glossy peaks form, about 5-7 minutes. Gently fold in the vanilla extract.
Transfer the meringue to a piping bag fitted with a large round tip. Pipe ghost shapes onto the prepared baking sheets, making them about 2-3 inches tall. Carefully place two mini chocolate chips on each ghost for eyes. Bake for 2 hours, then turn off the oven and let the meringues cool completely inside the oven for several hours or overnight.
For best results, make sure that your mixing bowl and whisk are completely clean and free from any grease, as this can prevent the egg whites from whipping properly. It’s also essential to add the sugar gradually while beating the egg whites to guarantee it dissolves completely, resulting in a smooth, glossy meringue. If you’re having trouble achieving stiff peaks, try adding a small pinch of salt to the egg whites before beating.
To create more variety in your ghostly treats, consider adding food coloring to make pastel-colored ghosts, or experiment with different piping tips to create textured spirits. For a more intense vanilla flavor, use vanilla bean paste instead of extract. Remember that meringues are sensitive to humidity, so store them in an airtight container in a cool, dry place to maintain their crispness.
These ghostly meringues can be made several days in advance, making them an excellent option for Halloween party preparations.
Witches’ Fingers Breadsticks
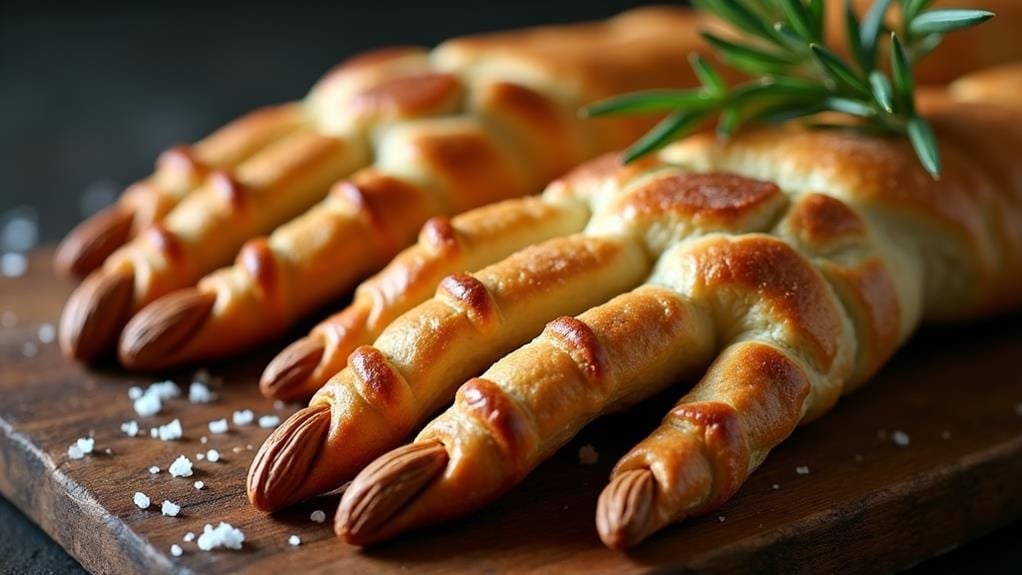
Witches’ Fingers Breadsticks are a delightfully creepy addition to any Halloween spread. These eerie, edible digits aren’t only fun to look at but also delicious to eat. Made from a simple bread dough, they’re shaped to resemble gnarled fingers complete with almond “fingernails” and knuckle wrinkles.
These spooky snacks are surprisingly easy to make and can be a great activity to do with children. The dough is pliable and forgiving, allowing for creativity in shaping each finger. Whether you’re hosting a Halloween party or just want to add a touch of the macabre to your dinner table, these Witches’ Fingers Breadsticks are sure to cast a spell on your guests.
- 3 cups all-purpose flour
- 1 tablespoon active dry yeast
- 1 teaspoon salt
- 1 cup warm water
- 2 tablespoons olive oil
- 1 egg, beaten (for egg wash)
- 1/4 cup sliced almonds
- 1 tablespoon coarse sea salt
In a large bowl, mix flour, yeast, and salt. Add warm water and olive oil, stirring until a dough forms. Knead the dough on a floured surface for about 5 minutes until smooth. Let it rest for 30 minutes.
Preheat the oven to 375°F (190°C). Divide the dough into 20-24 pieces and roll each into a finger shape, adding knuckle indentations. Brush with egg wash, press an almond slice at one end for the nail, and sprinkle with sea salt. Bake for 15-20 minutes until golden brown.
For an extra creepy touch, you can use green food coloring in the egg wash to give the fingers a sickly hue. Alternatively, brush the baked breadsticks with a mixture of olive oil and dried herbs like rosemary or thyme for a more savory flavor and a textured appearance that resembles wrinkled skin.
To store, keep the Witches’ Fingers Breadsticks in an airtight container at room temperature for up to 2 days. They can be reheated in a warm oven for a few minutes to restore crispness.
If you want to prepare them in advance, you can freeze the shaped, unbaked fingers on a baking sheet, then transfer to a freezer bag. Bake from frozen, adding a few extra minutes to the cooking time.


